Go to the previous, next, chapter, table of contents.
3 Guide to Creating a LAN
3.1 Step by Step
This quick guide will show you how to setup a LAN (Local Area Network) between
an Amiga to Amiga or Amiga to PC or combination of these. The guide is based
on the Ariadne ethernet card manufactured by
Villagetronic
- Start the Genesis Preferences
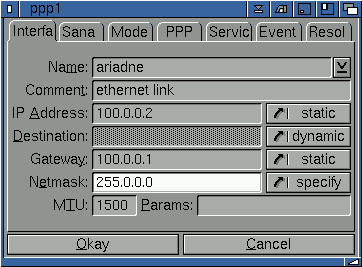
- Go to the 'Interfaces' section and define a new entry.
Select your ethernet board (for this example 'ariadne') with the popup button
or enter it manually if it's not available in the list.

Enter a comment for the new interface, if you require this.
Switch the IP Address to 'static' with the cycle button and enter any IP
address, but for this example we will use 100.0.0.2 (let's assume that the
IP address on the PC will be 100.0.0.1 (as it has to be different).
Don't pick an IP address in use on your system. For example, if you have a static
dialup IP address with your provider, don't enter this as the LAN IP address!
Switch the Netmask to 'specify' and enter a netmask for the previously chosen IP
address (eg. 255.255.255.0).
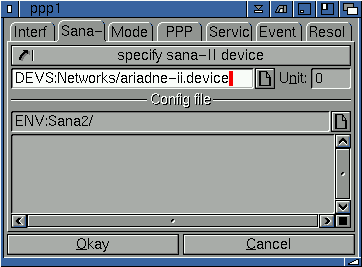
- Go to 'Sana II' section, switch the cycle button to 'specify sana-II device'
and select the device of your ethernet board (in this example 'DEVS:Networks/ariadne.device)

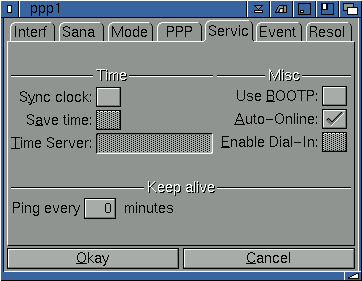
- Go to the 'Services' section and set the checkmark (Auto-Online) if you want your LAN started automatically
on Genesis startup.

Press the 'Okay' button on all windows and go back to the main Genesis Preferences window.
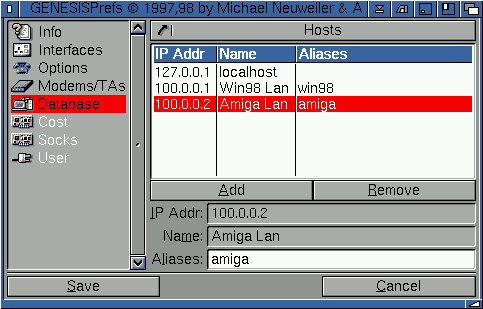
- Go to the 'Database' section, switch the cycle gadget to 'Hosts' and enter all the
hosts available on your LAN. For example:
| 100.0.0.1 | win95.lan | win95 |
| 100.0.0.2 | amiga.lan | amiga |

You can see we have two computers on this example LAN. The Amiga and the PC. The aliases
allow you to "talk to" the computers without having to remember their IP address - so that
the PC, for example is known to you as "win95", rather than "100.0.0.1".
- Save this configuration and start Genesis.
- Open a shell and try 'ping amiga' or ping any other machine on your LAN.
3.2 Configuring the Other Computers on the LAN
You can connect your Amiga to a PC/Unix/Mac/Amiga computer and create a network between
on or more machines. For instance, you might own a PC and an Amiga and wish to connect
these via ethernet and share one printer, files across the two computers etc.
To do this, simply set up the Amiga side as shown above. Then move across to the PC
and go to setup networking for this machine (adding the correct IP address into
the network settings, for example).
Go to the previous, next, chapter, table of contents.


